I´m an illustrator now

CHARACTER

A few weeks back a lovely client contact me and ask me for a custom avatar design, she said that she loved my Miss Lily Shades and she wanted something similar for her bussines. I had done inllustration in the past, so I said Yes.. after I finished she was very pleaced and she shared the illustration in a group of bussines women, and I started to have a ton of requests.. And belive me… I looove making this beatiful characters. Making their faces into this lovely images.. is so fun and rewarding. Also the filling of helping this people making their bussines more atractive and professional is awesome. So from now on, I´m open for request of illustration… At my shop you´ll se the listing for that, but I can do full illustration not just character standing still but also scenes with custom lettering too!.

character-process2character-process

Clear Stamps

il_570xn-1006966033_tktf

This past April I launch my very first clear stamp set, of course of Miss Lily Shades, as simple as it looks, it was a big acomplishment for me and for my bussines, Thank God, everybody like the design of the set and it been selling great.. Hopefully in the future I could make more designs. You can get it in my etsy shop!

il_570xn-1006966027_6ja0

New year New planner.

Hello Everyone, Happy New Year, I hope you had a wonderful Christmas Holiday. I want to share my  first video on youtube where I show how to set up your Lovely Scrolling Planner for 2016; Using all the stickers that the planner comes with and the ones I sell on my shop. I hope you like it and like all youtuber say “give it a thumbs up” 🙂 Enjoy!

Christmas is here!

miss-lily-christmas2

My favorite time of the year is finally here, Christmas is all about remembering the birth of Jesus our savior. Even if it´s not the exact date, the whole world remembers the history and life changing event. Christmas is not about gifts, its not about Santa Claus and comercial images, its not just about sharing love; even though that is one major thing we have to do. Christmas is all about remembering the birth of Jesus , son of the Almighty God, that came to earth as a humble servant and died in our place; justifying the sins of mankind. This year we should share the Love Jesus gives us , share it with the people we love, and with people that don´t know Jesus as a loving father and savior.

When I think of winter and Christmas , I always think about snow even though where I live, we dont get any , but I have beautiful memories from my childhood and some traveling experiences where I got to see and enjoy snow. I also want to share my latest sticker design with Miss Lily Shades. In this sticker set you´ll see Miss Lily having some winter fun and wating on “Santa”, putting all the christmas decorations and Nativity set. I hope you enjoy this set if you already ordered it.

Merry Christmas Everyone I hope you have a wonderfull season full of Love arround you.

christmas-miss-lily-shadesmiss-lily-shades-3

Miss Lily Shades Autumn Set

Hello Everyone! this time I like to show you a little bit about my lovely character Miss Lily Shades, she has been very well received from all my followers from my first MLS sticker set I have on my shop, and this  time she is here once again showing us a little bit about her life in the fall times, She loves autumn, specially eating pumpkin pie and drinking lattes, also she loves to go pumping and apple picking.  I made a few wallpapers for you to download for your computer or phone and have a little of her with you this time of the year. Enjoy! .. And if you are interested in the sticker set you can find it in my Etsy shop! 🙂

autumn corregida

free-wallpaper-word

Miss-Lily-Shades-Autum-wallpaper-1 Miss-Lily-Shades-Autumn-wallpaper2

phone-wallpapers-word

iPhone-6-mockup-in-hand_wallpaper-mls

wallpaper-autumn_iphone6 wallpaper-autumn-iphone5-

Featured in Moleskine-world IG

Last week I was surprised when a dear friend Geninne tag me in a post that I had no idea was posted. I was featured on the moleskine instagram feed. (shown below). Very nice comment was published above my painting. The thing is that several months ago I was looking at the moleskin site watching all the sketchbooks and I decided to share some of mine, and last week they posted this portrait I painted last year in my large moleskine. This post is just to share my excitement about the event …haha.. this just makes me want to paint even more. If you found this post by any chance its probably because you love to paint or draw too, I hope you keep painting and drawing because art it one of the biggest fuels in life. 🙂

Oliver Jeffers, picture book maker.

I found this video via Pinterest about Oliver Jeffers and I just loved it, seeing someone that enjoys life through drawing images and creating stories just makes me happy. I believe everybody should do what they love and make profit out of it. I hope you find this video inspirational for your life and it did to mine.

Midori (fauxdori) Traveler´s journal envelope folder DIY

la foto 2

Using an old, used, all stamped mailing envelope could be the perfect way to make a folder pocket for your midori. Very easy to make and great for cool looking extra storage in you travel journal.

IMG_0735

As shown in the picture above I´m using an envelope I received from Hong Kong a few years ago with pretty mailing stamps, the size is a little smaller than a letter size paper. What you’ll have to do is to measure your planner, in my case I´m measuring my own planner (found on my etsy shop) and doubling the size cut the bottom part to leave it open and get the right size. Now folded in half.

You´ll get something like this. An envelope side and an open side.

IMG_0736

Using your sewing machine or if you are brave enough stitch it by hand, stitch that middle line you just fold.  As shown below.

IMG_0740

You´ll have something like this.

IMG_0741

Now using some kraft tape or washi tape as you prefer, cover the edges of the open pocket to reinforce it.

IMG_0742 IMG_0743

This will make it strong and prevent it from tearing. Do not close the pocket just protect the edges leaving it open.

IMG_0745

Now you can slip it under your insert.IMG_0746

And you are done!…you can go ahead and start decorating with memorabilia and whatever you want to put over your new envelope folder pocket thing.. haha.

IMG_0748IMG_0749IMG_0747   IMG_0750 IMG_0751

I hope you´ve like this DIY, personally I loved it!.. it gives my journal a traveled vibe and is very practical to store lots of things. Give me like and a comment if you´ve liked it and you want to see more midori/fauxdori related post. 🙂

Boring office chair makeover.

IMG_0292

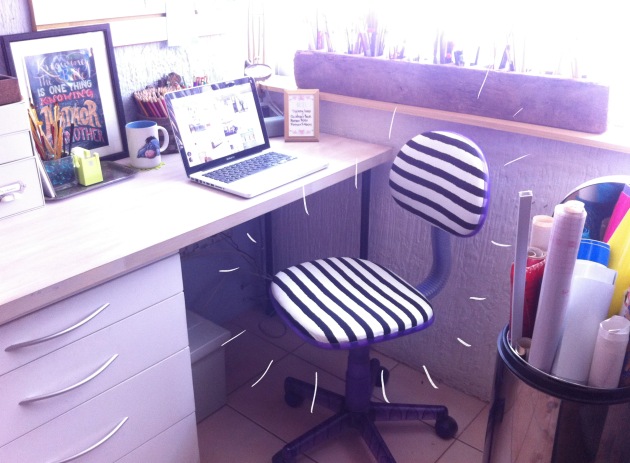
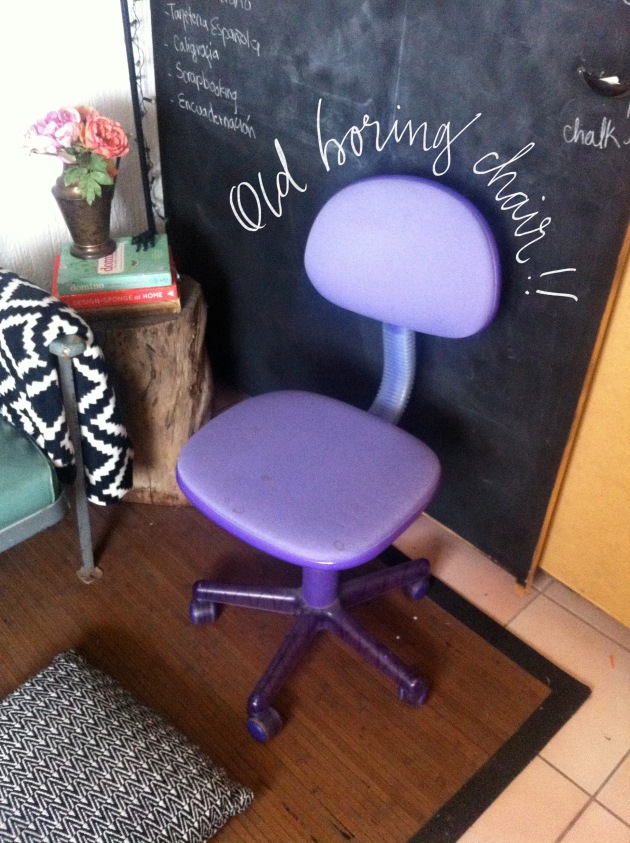
Having old furniture in your office could be quite depressing. Giving an uplift to your office chair could be a great inexpensive idea to make your office stylish and fun. Right now in my office I have a double desk and is mostly decorated in black-and-white with hints of mint and some coral pink , since I´m currently using a white aluminum Eames chair I wanted my other chair to also match and no look so out of place, so that’s why I choose this striped b/w fabric. This project took me less than an hour and it’s a pretty fun DIY to do on the weekend. You will only need a few tools that you probably already have at your home, I use some leftover fabric that I had from another project so this is a very inexpensive yet dramatic change project you can make for your office.

materials2

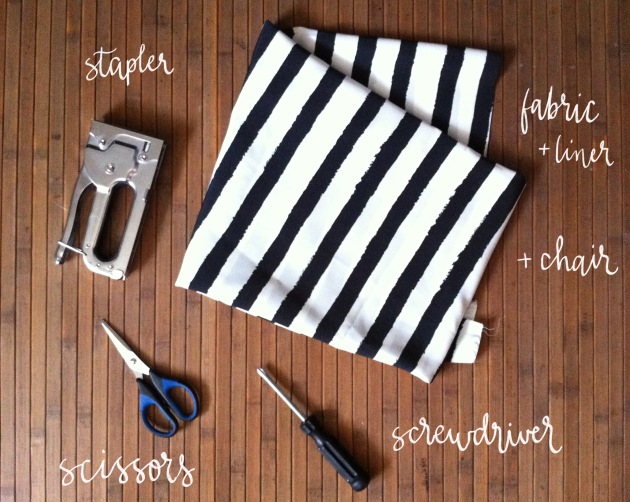
 of course a chair, stapler, fabric, screwdriver and some scissors.

IMG_0295


The first step you´ll have to do is to take apart your chair and expose the back part of the sitting and back cushions.IMG_0294

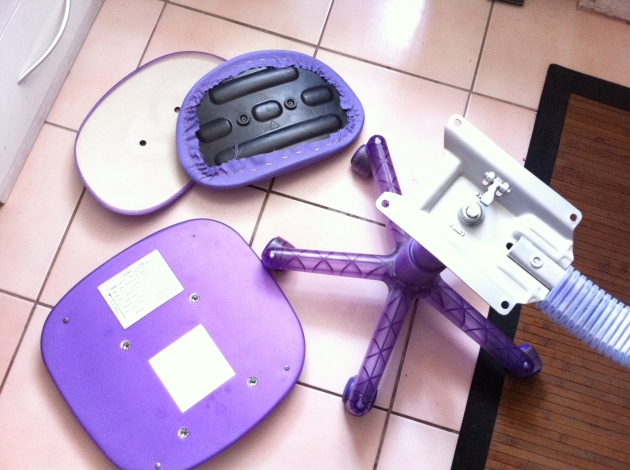
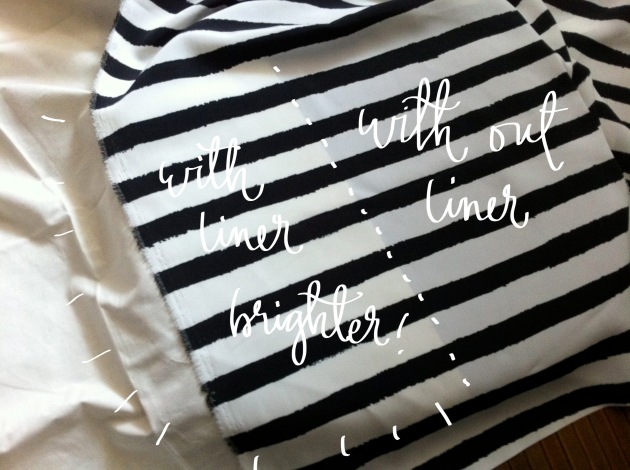
Since I’m using for this project a black-and-white print fabric I’m also adding a liner that helps brighten the white areas of my print. You can see in the picture below the difference it makes using the liner to the white color. Since my chair has dark purple cover it makes my fabric look a little bit dark, but if your chair has a light color fabric or your new fabric is completely dark you can skip this step.

IMG_0296

Go ahead and trace over your pieces of fabric the shape of the cushion leaving an extra 2 inches around the perimeter . Now you can start flipping the cushion over your fabrics and start stapling and tightening the fabric as you go along. IMG_0297

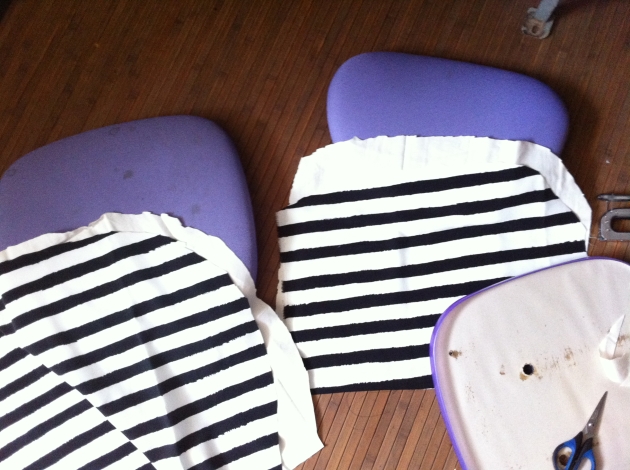
Its very important not to rush, you’ll have to flip your cushion several time to make sure its straight and alined, specially if your fabric has an specific patter or design it could end up crocked or not perfectly alined. Take your time during this step this is what makes it look profesional.

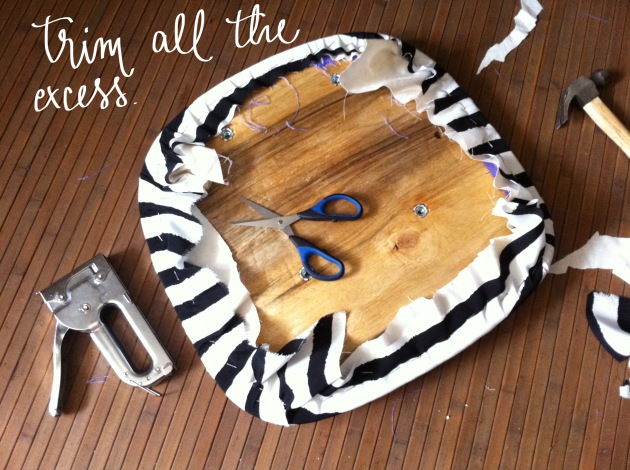
Onces you are done go ahead and trim all the excess fabric with a pair of scissors.

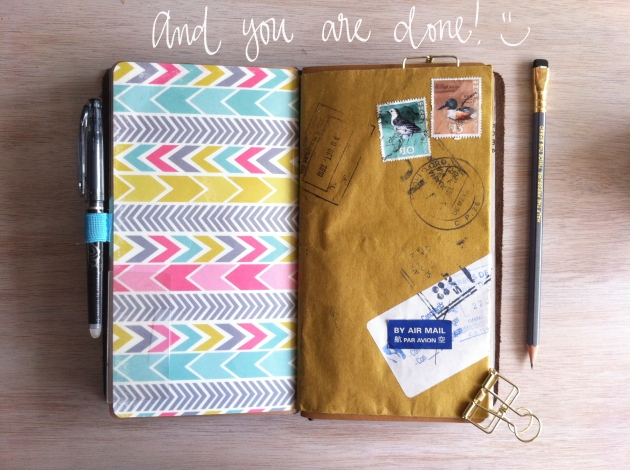
Assemble again the back part of your chair. and you are done! 🙂

IMG_0299


Now you have a very stylish new chair. You can also spray paint the legs and all plastic parts to match your fabric. in my case I decided not too because I wanted to still have a pop of color in this case the translucent purple color that I still like.

Tips on choosing your fabric would be not to choose  very stretchy one and also someone that it’s durable, easy to clean and that goes with your office Decor.

I hope you you’ve liked this post, please let me know in a comment and feel free to share some pictures if you re-created this DIY.IMG_0307